
Watercolor Painting Techniques for Absolute Beginners, Hello, my creative friend! When it is your first time ever touching a brush, it can feel quite thrilling and pretty daunting. Watercolor painting is an art form which is very fulfilling and allows you to create soft luminous effects which appear to glow on the paper. But if you’re new to this medium, you might feel unsure where to start, overwhelmed with the materials, or frustrated when your colors do not blend like you want.
This guide will help you take the first step with confidence. I would like to highlight the essentials, including the right tools and beginner-friendly techniques. By the end of the first part, you will know what watercolor painting is and you will feel ready to paint your first simple piece.
Key Takeaways
-
Learn what you’ll need to start watercolor painting.
-
Get acquainted with techniques like wet-on-wet, wet-on-dry, and washes.
-
Find out how to control water and pigment for effects you want.
-
Begin exercises that build confidence and skill.
-
Learn patience and observation while learning to paint with watercolors.
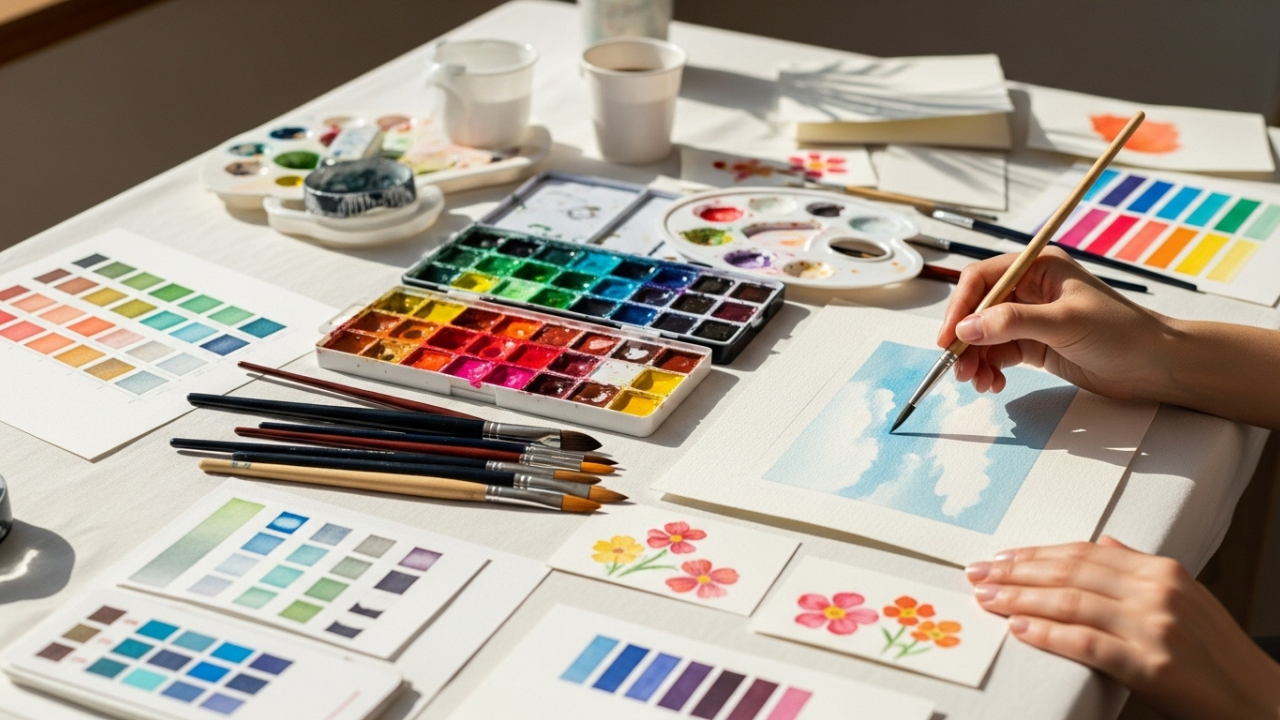
Understanding Watercolor Materials
Before you paint, check your paintbrush and its size. Is it a watercolor, canvas, or oil paint brush? Is this a small delicate paintbrush or a bigger fill (colour) brush? Having the right tools can ease the painting process and help you achieve your desired result.
Choosing the Right Paints
Watercolor paint comes in two main types: pans and tubes. Pans are solid blocks of paint that are small, convenient, and portable. Tubes have more intense colours and are better for larger projects. If you’re a beginner, get a good quality set with a small range of colours. This helps you practice mixing without getting overwhelmed.
Pay attention to pigment quality. Cheaper paints may lack vibrancy or have poor transparency. A starter kit that is beginner-friendly and of good quality leads to a dominant impact even if the colours are fewer.
Paper Selection
Watercolor painting needs paper which absorbs water in order to create the right final look. The three major types are cold-pressed, hot-pressed, and rough. Cold-pressed paper has a little texture—it isn’t as smooth as hot-pressed paper, but it is more absorbent. Hot-pressed paper is smooth and great for fine detail. Rough paper can produce grainy effects because of its texture.
Thickness matters too. Heavier paper (around 300 gsm) prevents buckling when wet. Using thinner paper may lead to warping and uneven washes. Smaller sheets are a great way to experiment with which texture and weight you prefer.
Brushes and Tools
Brushes are your main tool in watercolor painting. Round brushes are versatile for detail and broad strokes. Flat brushes are excellent for washes or straight edges. Detail brushes are little, pointed brushes used to paint fine lines and detail.
Brush materials vary too. Inexpensive and hardy synthetic brushes, natural hair brushes hold more water and produce smoother strokes. Get a palette to mix colours, masking tape to prevent streaks on edges, and a clean water container. Using a sponge or tissue can be useful for lifting excess paint and creating textures.
Basic Watercolor Techniques
Now, you will need to learn the basic techniques using your materials. Foundation is essential for every beginner to learn these methods of watercolor painting.
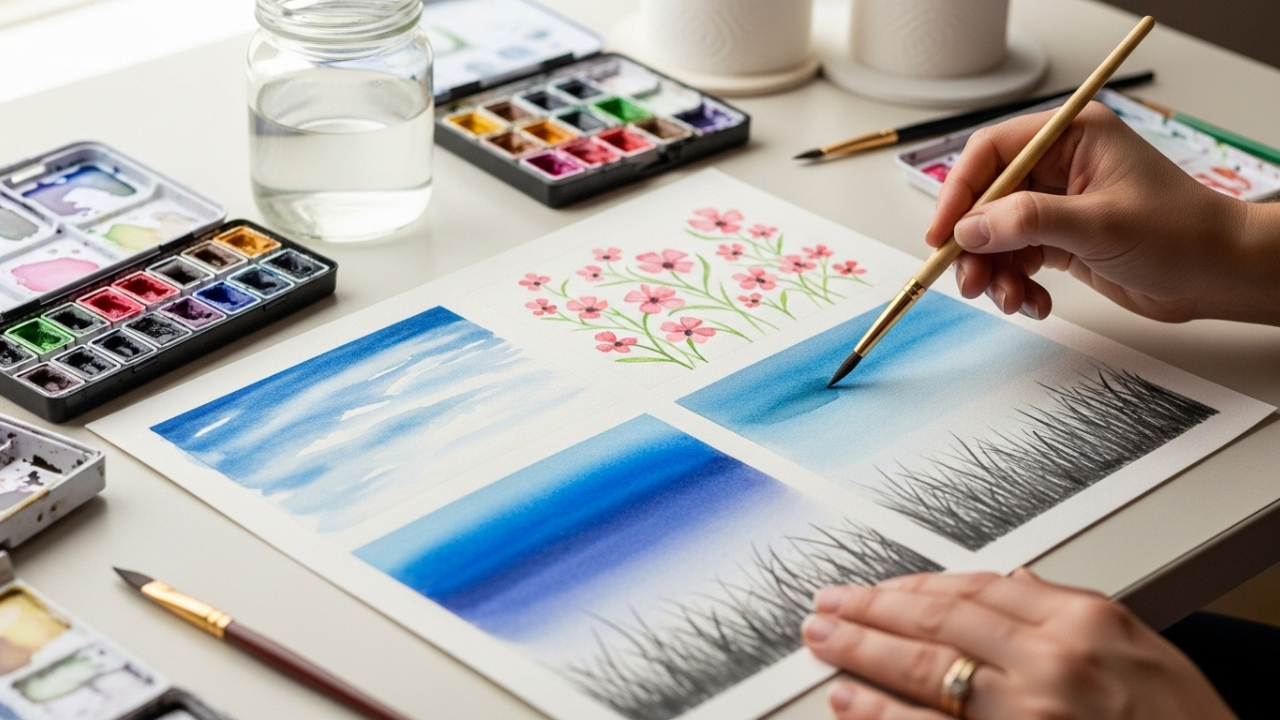
Wet-on-Wet Technique
The classic wet-on-wet technique is where paint is applied to wet paper. The blends look dreamy and natural and flow softly. For instance, a sky or soft floral petals can easily use this technique.
Wet the area with clean water and then drop in your pigment. Notice how the color spreads. One common blooper is overwatering, which makes colors run. Mix two colors and see how thin finger painting affects one another without working the paper too much.
Wet-on-Dry Technique
Wet-on-dry involves applying paint to dry paper. This method allows you to achieve more defined edges and control over shapes. It’s useful for defining objects or layering colors. For example, you can apply details such as leaves and flowers or outlines after first applying a soft wash background.
You can paint a circle on dry paper and fill it with different colors without mixing them into the dry background. It helps improve accuracy and shows how paint works with a dry surface.
Gradients and Washes
It’s necessary to include washes and gradients for smoothness. When flat washes are applied in an even manner on colour, graded washes transition from dark to light.
For practicing, take some color and mix it with lot of water and apply it at the top of the paper. Slowly reduce the pigment density as you move down. Notice how smooth transitions create depth. Watercolorists benefit from these exercises that tame water and pigment, both essential skills.
Dry Brush Technique
The dry brush technique is accomplished using very little water to get a scratchy, textural effect. It works great for details like grass and hair. Beginners often overuse water, losing texture. To start, use a brush that’s barely damp and drag the pigment lightly across the textured paper. Try some combinations of pressure and paint to create this effect.
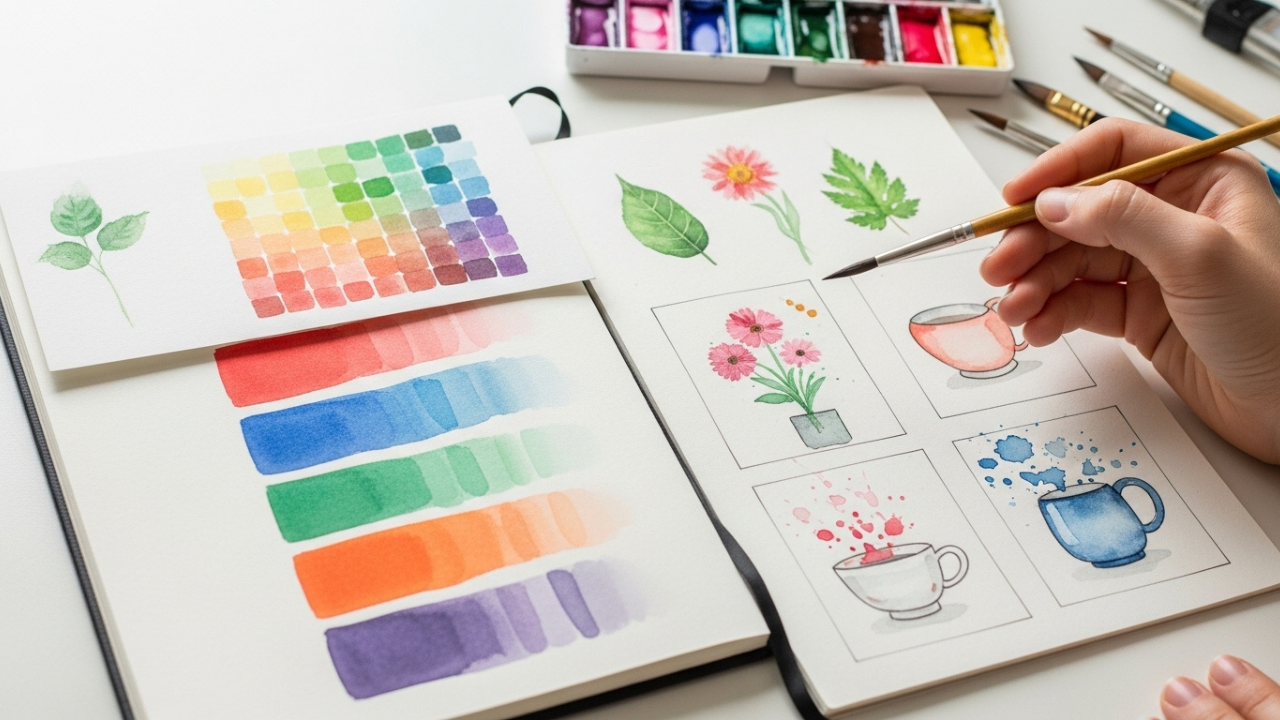
Color Mixing and Theory for Beginners
Knowing how colors work together is important in watercolor. Even simple subjects can appear vibrant and balanced once you understand the fundamental theories of colour.
Primary, Secondary, and Tertiary Colors
Primary colors are red, blue, and yellow. Combining these results in the secondary colors green, orange, and purple. When you mix a primary colour with a secondary, you get a tertiary colour. An understanding of primary and secondary colors can help a beginner feel more confident and not overwhelmed.
Creating Tints and Shades
Watercolors are naturally transparent and watering down colors creates tints. Layering darker tones adds depth and shading. Using tints and shades makes you more in control of how light or intense your colours are.
Avoiding Muddy Colors
Beginners often mix too many pigments that creates muddy colors. Do not mix too many colors to keep them clean. Knowing about complementary colors helps to keep your paintings bright and contrasting. Try simple charts where you mix two colors at a time and check the results.
Layering and Transparency
Layering lets you slowly build depth, while retaining the transparency of your watercolors.
Building Layers Gradually
Start with a light layer and then once dry, start to add darker layers. This prevents colors from bleeding and allows corrections. A light wash of sky can be darkened in one or two places to indicate clouds and shadows above.
Glazing Techniques
Glazing is applying thin, transparent layers over a dried paint to add luminosity. It’s a great tool to add soft shadows or brightness to leaves, flowers, and skin. Practicing repetition through layers builds patience and control over time.
Lifting and Correcting Mistakes
Mistakes are part of learning. You can easily correct watercolour by lifting paint using a moist brush, tissue, or eraser. For those who are just starting out, lifting on a spare sheet gives beginners more confidence and lessens any fear of making mistakes.
Composition and Sketching Before Painting
With painting layout planning, even a beginner can improve their painting results. Use composition to direct the viewer’s eye and balance elements in your work.
Simple Sketching Techniques
Make a light pencil sketch to guide your brush before painting. Keep lines soft so they don’t show through the painting. Start with basic shapes, and then refine those shapes to suit your subject.
When you start painting with pencils, it helps relieve any stress you may have. Color patterns, blending colours, and even layering colours become easy as you no longer worry about proportions.
Understanding Composition
Composition is about arranging elements for visual appeal. First, there are simple techniques a beginner can use. For example, the rule of thirds divides paper into thirds. By placing key elements on any of these lines or intersections they get attention naturally.
Always remember balance. If paper one side gets too heavy with details, then painting won’t have the correct feel. A small element, like a leaf or a flower, can counterbalance a larger shape. Planning a composition helps your artwork look purposeful, not chaotic.
Starting with Simple Subjects
When starting out, select a subject that is both simple and fun, it can be anything from a beautiful flower to a cute fruit. Leaves, flowers, small fruits, and skies are easy to start with. You can blend, shade, and layer without being swamped by too much detail.
Do exercises that ask you to paint a single leaf in three shades of your choice. Or a simple fruit with one wash of light and one wash of shadow. These small projects are meant to help you build skill and confidence while reinforcing basic techniques.
Practice Exercises for Beginners
Consistent, structured practice is key to improvement. These exercises will build your watercolor skills up step by step.
Color Blending Charts
Create charts mixing two colors at varying ratios. This teaches you about the interaction between pigments and the appropriate amount of water to use. It also produces control over transparency and vibrancy, which is vital for realistic effects.
Gradient Wash Practice
Gradients teach your hand how much water and colour to use. Make a wash of a color from light to dark on a strip of paper. Keep practicing till the transition becomes smooth. Use vertical as well as horizontal gradients.
Painting Simple Objects
Choose everyday objects like leaves, flowers, or cups. When you paint, start with lighter washes for the base colors and paint on darker layers for depth. When drawing an object, it is essential to pay attention to the light and shadow in order to create the illusion of three dimensions.
Layering and Transparency Exercises
You can practice glazing with dried paint by applying thin layers. Experiment with building depth gradually. See how the different layers change the tone of the paint. Notice how this transparency creates a beautiful luminosity.
Texture Practice
Use dry brush or splattering techniques to add texture. Experiment with making hard surfaces like the bark of a tree or soft surfaces like petals of flowers. Texture adds realism and interest to your paintings.
Common Challenges and How to Overcome Them
Most beginners deal with the same issues from time to time which can be avoided with some tricks.
Overwatering or Under-Watering
If there is too much water the spread becomes unmanageable and if too little water is there, the blending will become difficult. Practice measuring water ratios; experiment on scrap paper. Observe how different amounts affect your strokes.
Uneven Washes or Color Streaks
This happens often when paint dries fast or you move the brush unevenly. Always keep your brush laden with paint and water, and work quickly while the paper is wet. Practicing flat washes repeatedly will improve consistency.
Maintaining Clean Colors
If colors are overmixed or layers of paint are overlapping they get muddy. To keep colors vibrant, only use a color palette and clean your brush in between.
Patience and Frustration
When results do not match expectations, novices feel impatience. Accept mistakes as part of learning. Every mistake is an opportunity to develop control, observation skills, and find solutions. Taking a break and resuming the task later can help improve the quality of the work.
Tips for Creating Your First Successful Painting
Making your first complete watercolor doesn’t have to be complicated. By following these tips, the chances of finding success and enjoyment increase.
-
Choose a single item or object and draw that to start with in the beginning.
-
When you limit your palette to a few colors, mixing becomes easier and muddy colors don’t happen.
-
In each exercise, just focus on layering, blending, or wet-on-wet and then combining more than one technique.
-
Study your reference closely to see how the light is affecting its shade and color.
-
Don’t try to control watercolor; happy accidents often happen when they don’t go as planned. Accepting imperfection minimizes frustration and boosts creativity.
Advanced Beginner Tips
Even when starting out, there are little tricks to make your painting more professional looking.
Layering for Depth
Always let layers dry completely before adding another. This stops your brush from bleeding and allows you to build rich, glowing colours.
Adding Highlights
Paper can be used to highlight areas or a wet brush to slightly lift paint. Highlights inject life and reality even in simple things such as leaves and clouds.
Combining Techniques
Beginners can mix wet-on-wet with wet-on-dry or dry brush with glazing to express their creativity while learning to control watercolor. Start simple and experiment gradually.
Keeping a Practice Journal
Document exercises, note observations, and track progress. Taking notes on water ratios, brush techniques, and results helps solidify your learning and improve your skills.
Final Encouragement for Beginners
Watercolor painting is forgiving and exploratory. When you make a mistake, learn from each and every stroke. It matters most to learn to enjoy the journey, show up to practice, and give yourself permission to play. You will get your confidence and style that is all yours.
We all start from somewhere. As soon as you learn to be patient, observe well, and practice often, beautiful paintings that sparkle with delightful colours can be created!
How to package handmade gifts for shipping safely
How to package handmade gifts for shipping safely, Imagine spending hours crafting a delicate handmade gift. You wrap it up, ship it out, and wait
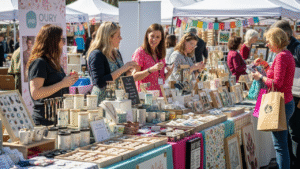
Best Craft Fairs to Sell Handmade Items in the US
Best Craft Fairs to Sell Handmade Items in the US, It would be striking to spend hours making handmade items, only to have no one

SEO Tips for Etsy Listings for Craft Sellers
SEO Tips for Etsy Listings for Craft Sellers, Picture the scene: spending hours creating gorgeous handmade items but not selling ANY on Etsy. Your products

Trending Handmade Products to Sell in 2025
Trending Handmade Products to Sell in 2025, If you spent hours making unique handmade items for sale in 2025, would you struggle to decide which
