
How to Make Paper Flowers for Home Decoration Step by Step, When you create something lovely with your hands, it has a kind of magic. When I began to make paper flowers, I never thought they would bring me so much joy—in not just how they looked, but how the process felt so calming. If you’ve ever looked at a bouquet and thought I wish I could make something like this myself, then you’re in the right place, my friend! This guide will cover all the things you need to know about how to make beautiful paper flowers for your home, one petal at a time.
Before We Get Started
Here are a few things to remember as you get started.
Key Takeaways
-
Paper flowers are cheap, durable, and customizable.
-
You don’t need fancy tools—just patience and creativity.
-
Start simple; the joy is in the making, not the perfection.
-
Pick a paper that works with your design rather than looks nice.
-
Small details, like curling and layering petals, make all the difference.
Why Paper Flowers Can Transform Any Room
The first time I ever made a whole bunch of tissue paper peonies I remember. My dining table suddenly looked warmer, more alive. Paper flowers bring decorative change in a painless, colourful way. They transform an empty space by adding an element of colour and creativity. Unlike real flowers, they don’t fade, wilt, or demand care. No matter the occasion, they stick by you through thick and thin, always in style.
Beyond their beauty, they carry a sense of accomplishment. Making each petal by yourself gives one a sense of grounding. Moreover, choosing colours to match your mood and arranging them in your space. Whether you’re a home decorator or a hobbyist, paper flowers are quite an art and easy to make. You create them once, but they bring joy for months.
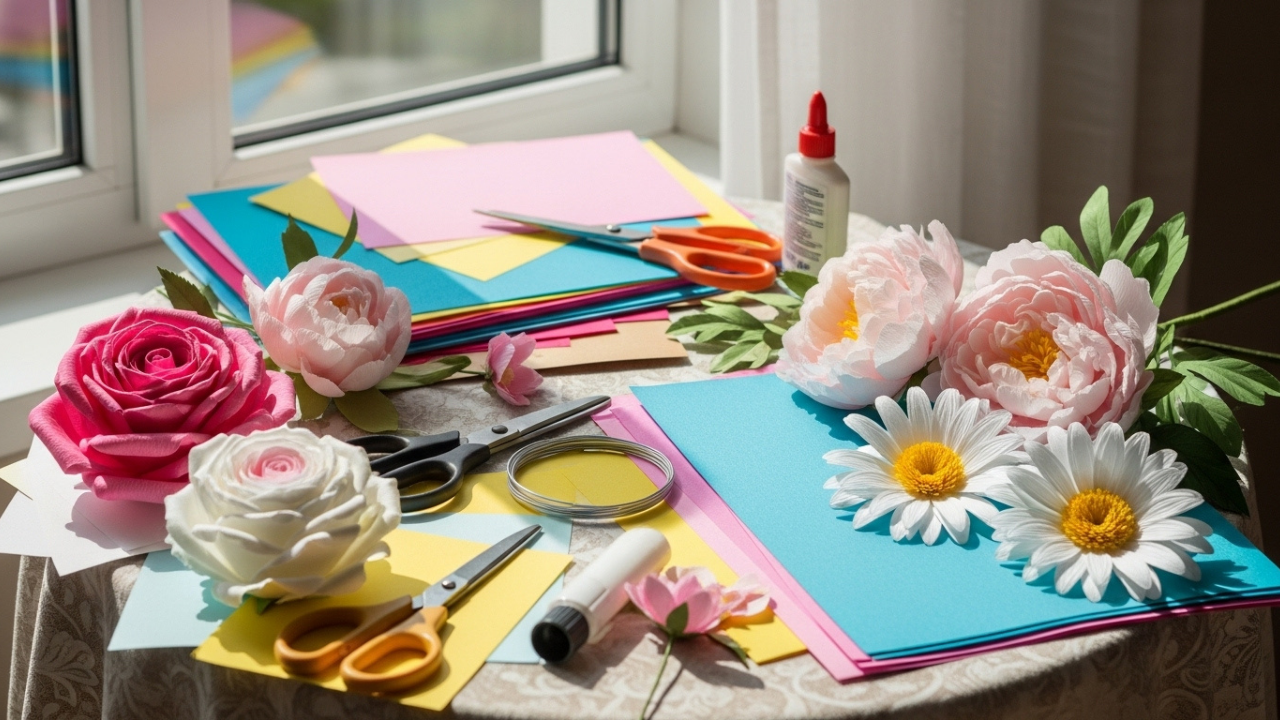
Gathering the Right Tools and Materials
Before I started, I learned that it is better to prepare than to regret. You don’t need costly craft supplies to make paper flowers. It is better to have fewer highly-skilled and equipped troops than many regular ones.
I usually have three types of paper – crepe paper for flexibility, cardstock paper for structure, and tissue paper for soft, fluffy petals. Each behaves differently. Crepe has a beautiful eye and stunning stretch and curviness. Cardstock is sturdy and holds its shape for strong designs. Tissue is airy, dainty, and romantic.
Next, you’ll also require a sharp pair of scissors, craft glue, floral wire, and tape. Use a ruler and pencil to draw your designs and use a cutting mat to protect your table from cutting marks. When you place the items neatly here, it seems like an art studio that is simple, tidy, and allows for creativity.
For beginners, choose one paper type and one flower design. It’s better to perfect one flower than to juggle many.
Creating the Perfect Workspace
When I sit down to create I think of it as a kind of ritual. I love to sit in a clean and bright corner with a cup of tea and music playing in the background. You don’t need a big room. With the right setup, even a table in the kitchen can do wonders.
Keep your surface clear while gathering your tools within reach. If you’re using hot glue, place it on a heat-resistant pad. Work on a flat surface so your petals don’t bend or get creased before you even begin.
One small piece of advice from experience—never rush. Each step deserves its own time. When you slow down, you sense how the paper feels to your fingers, notice how the edges are curling, and understand how these tiny mishaps make your flower look more natural. Making something does not mean to produce it quickly. It is doing it carefully.
Learning Basic Paper Flower Techniques
The Art of Making Paper Flowers: From Petal to Home Décor
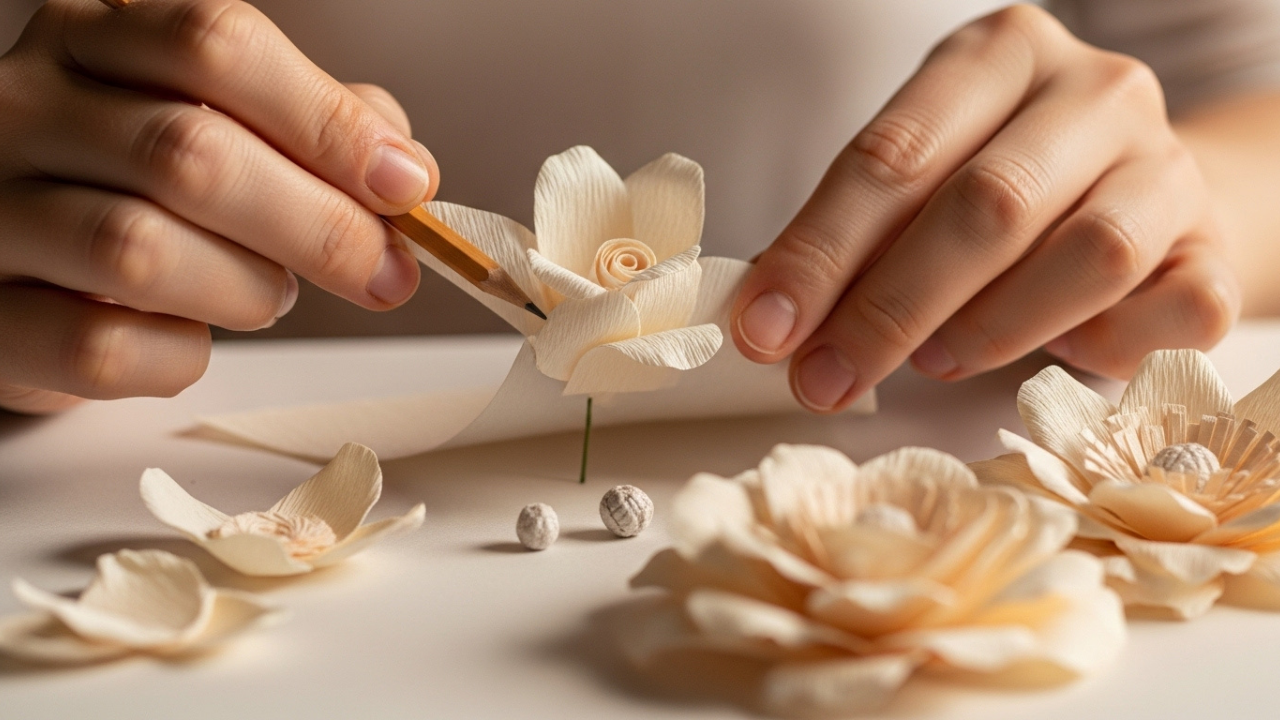
Each paper flower begins with one template: a petal. You create the outline, cut out the shape, and then manipulate it for a unique look. The first time I did this I was stunned how simple actions could create something that seemed alive.
When cutting, do it slowly and let the curve happen – do not fight the paper. After you make the petals, use a pencil edge or back side of a spoon to curl them. This gentle curve mimics how real petals bend in nature. For crepe paper, gently stretch the middle with your thumb and index finger. This gives a soft look and makes flowers appear more natural.
To build a flower, start from the center. Some makers use small paper balls, cotton, or beads for the centre of the flower. Put the petals in one layer at a time and glue them or tape them with tape. As your flower grows, change the angle of your petals and their size to create depth.
I enjoy lifting it every few minutes to view it from several sides, which has a different effect. Sometimes, what looks perfect on the table looks flat when lifted. Let go of getting it exactly right. Paper flowers aren’t perfect and don’t need to be! It’s all about personality!
Crafting Your First Paper Flower Step by Step
Let’s make a simple tissue paper rose together. It is easy-going, forgiving, and beautiful—it can lighten up a room.
Cut about 6 inches wide squares of tissue paper – many pieces. Stack them neatly and fold them accordion-style. Once folded, secure the center with a thin piece of wire. Make both ends rounded; these will be the tips of your petals. Slowly spread the layers out, separating one sheet at a time. As you pull each layer upward, a soft bloom begins to form.
Once you reach the middle, use your fingers to fluff and shape it. Wrap the wire stem in floral tape to finish it off. There it is—your first handmade flower. Though it seems simple, place it in a vase or tie it into a bundle and it will become something you will be proud to boast.
You will notice that as your confidence deepens, small changes like cutting further into edges or mixing paper colors will begin to transform your designs. What starts as one flower can become more, and soon after, you will have a handmade bouquet sitting on your shelf.
Adding Dimension and Realism
The beauty of paper flowers is that they look real from a distance, but up close, they are uniquely yours. Change the color and add layers to make it look real.
I use watercolor or marker to paint a soft gradient around the edges of petals. Even a faint touch of pink or gold can give depth. To give your petals a soft shimmer, dust a little pearl powder on them before assembling.
Texture also matters. The natural ridges of crepe paper imitate real petals, and the curled edges offer a blooming effect. Every flower type—rose, peony, daisy, lily—has its rhythm. Once you recognize it, you can mirror it easily with paper.
Why Making Paper Flowers Feels Therapeutic
I never expected paper crafts to be that relaxing until I gave them a try. Whenever the day becomes too overwhelming, folding and shaping paper helps quiet my mind. The rhythm of cutting and gluing is meditative. Beauty comes with a little bit of waiting and not much motion.
For anyone looking for a mindful hobby, this is it. You don’t need to be an artist. You just need to show up with paper and time. Few things feel as good as creating something from scratch. Many people I’ve taught say they feel calmer, more creative, and even proud of their work.
Making paper flowers is an art of crafting and decorating! Every petal you shape carries a bit of you in it.
Turning Simple Flowers into Elegant Home Décor
One handmade flower can really change up your shelf. However, when you begin to group them together, there is a magic that happens. The key is to think like a decorator, not just a crafter.
I often start by choosing a theme or color palette. During spring, I prefer soft pastels like pink, yellow, and lavender. Once Fall comes, I like wearing warmer tones of deep orange, burnt red, or gold. Use the shade of your walls or curtains or tablecloth when selecting flowers to help them look naturally complemented.
At times, I create an arrangement with mixed materials. Crepe creates shape, cardstock gives it a base to stand on, and tissue makes it look soft and delicate. The dissimilarity lends the configuration a genuine feel despite being fictitious. In the past, I created a flower centerpiece using used book pages. I placed it on my coffee table, and it stayed there for months. Your unique touches and insights make your work your own.
How to Arrange Paper Flowers Like a Designer
Making paper flowers is a personal endeavor and does not have strict rules to follow, but keeping in mind a few principles can make everything flow better. To get started, I usually choose a showy flower such as a sunflower. I add some medium and smaller blooms around it for balance. Use authentic branches, dried leaves, or even sticks from your yard for added height and variety.
For vases, think beyond the usual glass cylinder. Try using mason jars, old teapots, or painted bottles. They give your arrangement personality. We want the flowers to look like they grew there, instead of placed there as a display piece.
For a wall installation, use light paper and glue dots rather than heavy adhesive. Begin from the middle, and work your way outwards. Overlap your leaves and colours in a spontaneous manner. Once I made a wall full of paper roses for a friend’s birthday. It took me hours to complete it, but the smile on her face was worth it.
Making Large Paper Flowers for Statement Décor
Large paper flowers will give your decor a more regal air when you are ready! They encourage people to make bold statements on walls, in the corner of rooms, or above the headboard. It may appear complicated to make solar cells, but in actuality, the process is simply bigger, not more difficult.
Use a thicker paper for support and knit it with a little more patience. I cut out large petal shapes of poster paper or thick crepe paper, and then curl their edges with a rolling pin or the side of a glass. Layering is the trick here. Each flower petal should slightly overlap the next flower petal like real flowers bloom in slow motion.
When assembled, I glued the flower onto a piece of cardboard with a hot glue gun and attached a loop on the back to hang the flowers. With these big flowers, even a simple wall can look stunning. I’ve seen them at weddings, baby showers, and in restaurants as decor. And the best part—they last forever.
Blending Paper and Real Elements Together
Sometimes, perfection lies in mixing mediums. I like to pair my handmade paper flowers with fresh greens, dried pampas, or gunny. Natural (living) and manufactured textured elements strike balance.
When making a centerpiece, use real leaves as a base and insert your paper flowers in between them. This blend feels natural yet timeless. You could also add a few drops of floral essential oil on the paper petals. This gives them a faint fragrance that can easily fool your guests.
Blending also works beautifully for gifts. A paper flower stuck in a real flower bouquet creates an impression of I made this for you. A thoughtful gift will always be treasured more than an expensive gift.
Keeping Your Paper Flowers Fresh and Lasting
Paper might look delicate, but your flowers can last years with care. I have a paper flower bouquet that I made five years ago. It still looks as beautiful as it was then. The secret lies in protection and placement.
Keep your flowers out of bright sunlight as much as possible; it fades them. Avoid exposing them to moisture and dust them every few weeks with the help of a brush or hairdryer on the cool mode. If a petal bends, reshape it carefully with your fingers. A gentle heat from a hairdryer can do the trick for stubborn creases.
When you must store them, wrap them in tissue and pack into a shallow box. If you live in a humid area, put some silica gel packets to keep moisture away. This tiny step would result in retaining the texture and colour beautifully.
Fixing Common Paper Flower Problems
Every crafter faces small mishaps—it’s part of the process. Flower heads sometimes tear, the glue shows, or it loses shape. The trick is knowing quick fixes.
If a petal tears, apply a thin coat of clear glue on the rear and press gently until it holds. If your flower is too flat, open up the petals and add extra layers. To hide glue marks, cover them with a small piece of paper or a bead centre that matches.
Once, the complete bouquet drooped as I used thin wire. I used a heavier gauge of floral wire, tape, and a glob of glue to hold the stems together, saving the design and making it look sharper. Your work doesn’t get ruined by mistakes, but rather it gets improved.
Using Paper Flowers for Special Occasions
Paper Flowers for Life Events and Celebrations
When you learn the skill of crafting paper flowers, they can become an essential part of life events.
Holidays, birthdays, weddings, and anniversaries are just a few events that benefit from paper flowers.
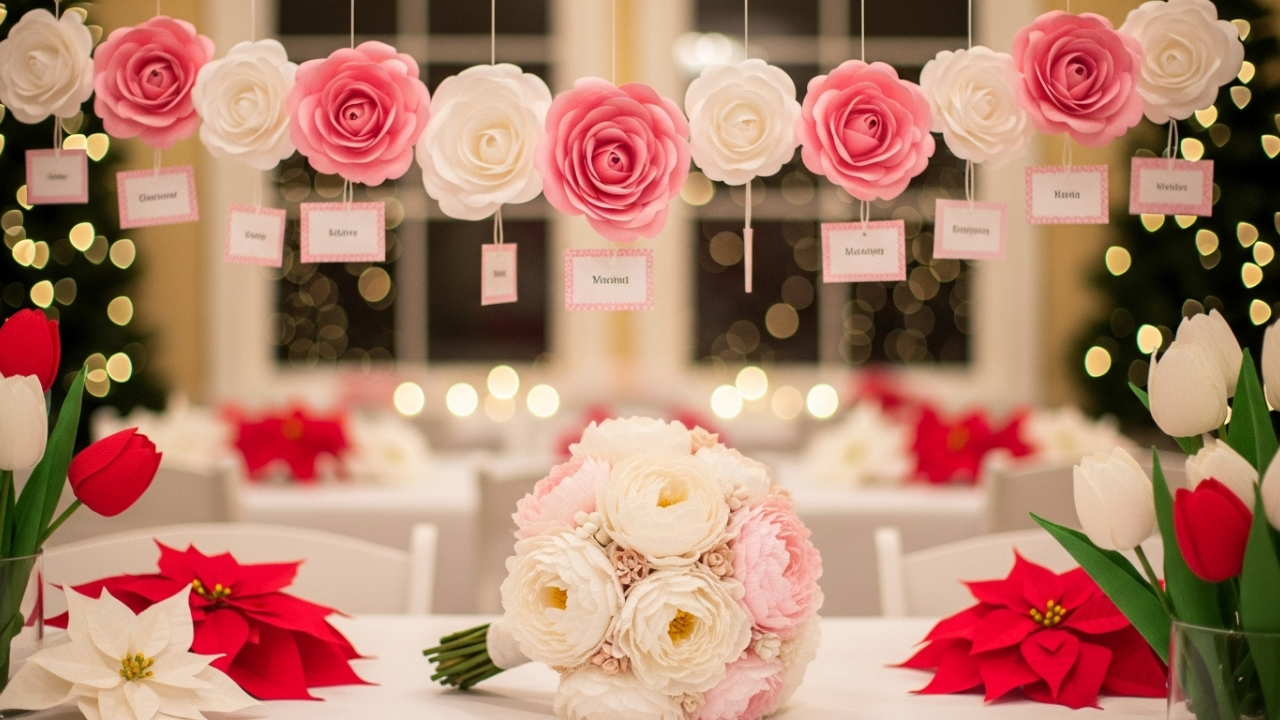
I remember helping a friend decorate her baby shower. We created pink and white ones to hang down from the ceiling with a name card attached to each rose. Guests were amazed when they learned they were handmade. You can customize any petal you want to suit the occasion beautifully.
For weddings, paper flowers are a budget-friendly dream. These can be made weeks in advance, are durable and easy to transport. Once I made a bridal bouquet with a mix of soft ivory, blush paper peonies. This bouquet photographed beautifully and the bride got to keep it.
Even during the holidays, paper flower poinsettias, snowdrops, or tulips do not wilt and add festiveness. You will see that one piece of paper can make many things when you understand how adaptable they are.
Exploring Creativity Through Custom Designs
The beauty of making paper flowers is that there are no limits to creativity. Every maker develops their own style. Realistic designs are preferred by some, but others like bold, fantasy-like forms. I like to play with texture, such as mixing metallic papers with soft matte ones or lace on the edges of petals.
One of my dearest projects has been a “memory bouquet.” Each flower is made from the pages of an old letter of someone I love so that each petal is representative of a loved one. It certainly was sentimental, but it was also quite personal. It proved to me that art can be more emotional than it appears.
That’s the beauty of handmade work. Each flower tells a small story, one only you could write.
How to Photograph and Display Your Work
If you plan to showcase your creations on the internet or at events, presentation is important. To ensure a well-lit shot, position your flowers in a window and use a neutral background. Focus on soft shadows that highlight texture.
Your display should account for the light around the house. Place flowers of a brighter color near neutral walls and pastels in bright rooms. With a little help from the right setting, your flowers can look straight out of a picture-perfect studio.
I once put a bunch of white paper daisies next to my reading chair. Each morning sunlight hits them and casts shadows that softly ease them into a glow. A daily reminder of joy from a simple craft, that will bring tranquility to your space for eons.
Paper Flowers as a Mindful Practice
You might be realizing something deeper about this craft by now; it’s not just for decoration. Making paper flowers becomes a small act of mindfulness. When I sit down to craft, I forget about time. Cutting and curling petals, layering them down slowly—it’s almost like a meditation.
A lot of the people I taught said it helped them focus, helped them breathe, helped them stay calm. In a fast-paced world, an activity such as making paper flowers helps us slow down and reconnect with our creativity.
Even if your intention is just to beautify your space, it eventually turns into something more. You discover patience, peace, and pride in your own handiwork.
The Last Words to Help Turn Nothing into Something
At this point, my friend who dabbles in the arts, not only have you learned a craft. You’ve also learnt a skill that the world needs. The world needs beauty, creativity, and calm. With everything from your first paper rose to your huge floral wall, there’s a bit of you in each creation.
Your flowers say something about you—the maker who took ordinary paper and transformed it into everlasting pieces. Whether they’re sitting pretty in a vase, hanging on a wall, or brightening up an event. And that, truly, is what home decoration is all about.
So grab a paper, take your scissors in hand, and start your next bloom. Your home is waiting to wear your creativity proudly.
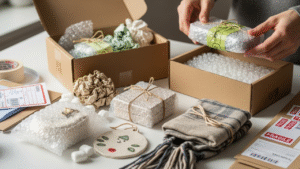
How to package handmade gifts for shipping safely
How to package handmade gifts for shipping safely, Imagine spending hours crafting a delicate handmade gift. You wrap it up, ship it out, and wait
Best Craft Fairs to Sell Handmade Items in the US
Best Craft Fairs to Sell Handmade Items in the US, It would be striking to spend hours making handmade items, only to have no one

SEO Tips for Etsy Listings for Craft Sellers
SEO Tips for Etsy Listings for Craft Sellers, Picture the scene: spending hours creating gorgeous handmade items but not selling ANY on Etsy. Your products
Trending Handmade Products to Sell in 2025
Trending Handmade Products to Sell in 2025, If you spent hours making unique handmade items for sale in 2025, would you struggle to decide which
