
Simple DIY Wall Art Ideas for Small Apartments
Simple DIY Wall Art Ideas for Small Apartments, Living in a small apartment has its perks—it offers a cozy nook, easy cleaning, and above all, intimacy. But small spaces can sometimes feel confined, and the walls can feel a little too… blank. When I first walked into my tiny apartment, staring at the white walls, I wondered how I could make the space feel like mine without breaking the bank. That’s when I discovered the magic of DIY wall art.
The best part about creating your own wall art is that it is personal, affordable, and perfectly sized for smaller spaces. No need for oversized paintings or expensive prints. With a little imagination, some basic household items, and the willingness to experiment, almost anything is possible. By the time you finish reading this guide, you’ll see your small walls as blank slates full of potential.
Key Takeaways
-
Almost every wall in a small apartment can become a canvas for art that personalizes your home.
-
DIY projects using household items save money and prevent waste.
-
Even beginners can create stylish and functional wall art by following simple steps.
-
Proper planning, material selection, and scale are key to decorating small areas effectively.
-
Mistakes are part of the creative process—embrace them as learning opportunities.
Why Wall Art Matters in Small Apartments
When moving into a tiny apartment, it’s easy to notice how empty walls can make a room feel restricted. In small spaces, blank walls often amplify the sense of confinement. The right wall art changes everything—it adds warmth, color, and personality, helping your apartment feel lively and inviting.
Wall art is also perfect for beginners. It doesn’t require advanced skills or large materials. One DIY project can become a room’s statement piece, while a collection of small pieces can create a cohesive, curated design.
Adding Personality to Limited Space
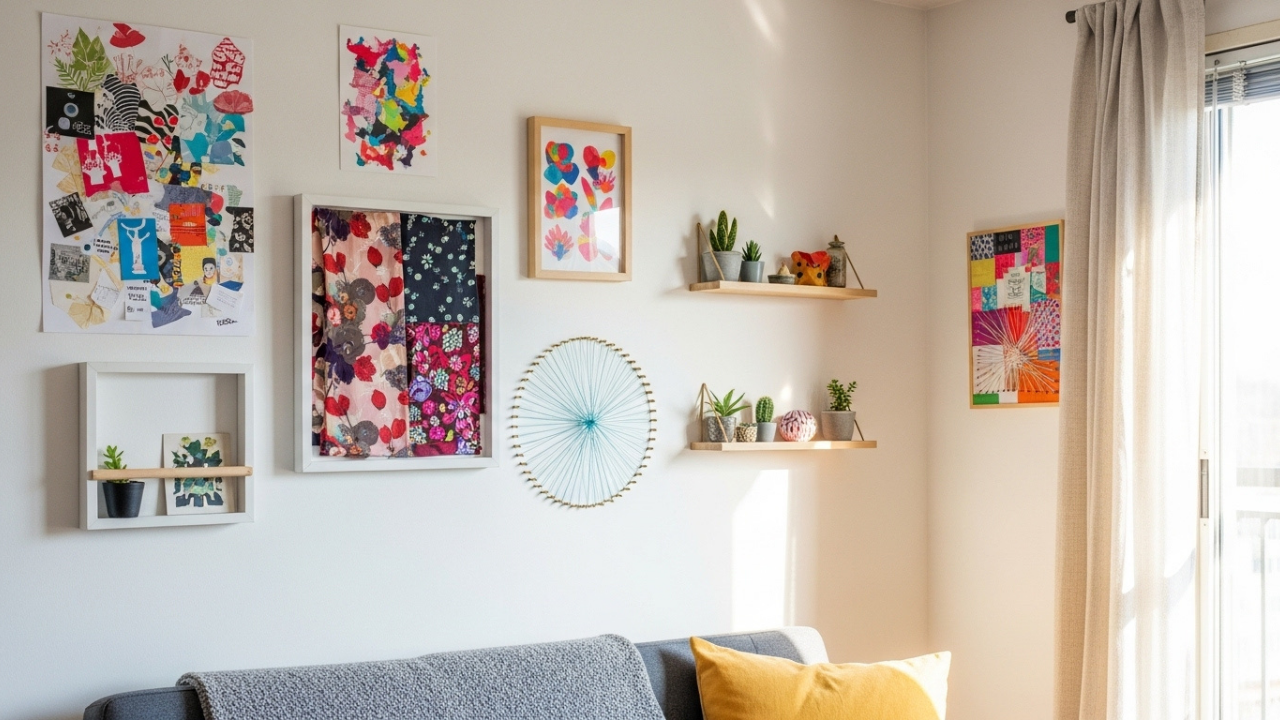
I started with a small corner in my living room. The space was too tight for a full bookshelf or large furniture, but it became the perfect spot for a DIY gallery. Using small frames made from magazine paper and an old scarf stretched on cardboard, I transformed the area immediately. It felt personal, unique, and full of life.
Walls in a small apartment aren’t just for decoration—they’re a way to show your style. Whether you prefer minimal designs or colorful patterns, wall art reflects your personality without taking up precious space.
Affordable and Functional Decoration
Decorating a small apartment with shop-bought wall art can get expensive fast. DIY projects, however, are budget-friendly and functional. You can use items you already have at home: cardboard, paper, jars, fabric scraps, or leftover paint.
For example, I once turned a cereal box into a tiny frame for a photo collage. It cost nothing, yet added charm and personality. Creating your own wall art allows you to experiment freely with colors, styles, and materials without fear of wasting money.
Planning Your Wall Art DIY
Before you start cutting, gluing, or painting, take a few moments to plan. Thoughtful preparation ensures that your artwork complements your space and avoids unnecessary frustration.
Choosing the Right Wall
Not all walls are ideal for DIY art. In a small apartment, select walls that naturally draw attention—behind a sofa, above a bed, or along a hallway. I learned the hard way when I hung my first piece in a tight corner—it looked awkward. Always imagine how the piece will look from different angles and distances before starting.
Also, consider natural light. Bright, well-lit walls enhance colors, while dim corners may require lighter shades to make the art stand out. Choosing the right wall is key to a successful project.
Understanding Your Style and Color Palette
Early on, I would mix colors randomly, and the results were… less than ideal. Over time, I discovered that a consistent color palette makes a small space feel larger, more organized, and visually appealing.
Start by observing your furniture, curtains, and rugs. Pick two to three primary colors for your wall art, then add one or two neutral shades. For example, if your sofa is gray, soft pastels in frames or paper art can create balance without feeling heavy.
Gathering Materials
The fun part of DIY wall art is discovering the creative potential hiding in your home. I check every drawer and cabinet for items that can be reused. Old magazines, wrapping paper, cardboard boxes, scraps of fabric, and unused greeting cards are all potential materials. Add paint, washi tape, string, and glue to complete your toolkit.
The key is to think of materials as “raw potential” rather than trash. That cereal box about to be recycled? It could be your next photo frame. That leftover scarf? Perfect for stretched fabric wall art. Once you start thinking this way, the possibilities multiply exponentially.
Easy DIY Wall Art Ideas
Let’s get hands-on! I’m going to show you a few easy projects you can do at home. These are perfect for small apartments, require normal household items, and don’t need much experience.
Project 1: Paper Collage
For this project, I used old magazines and a canvas board. I cut colorful pages into various shapes and patterns to create a playful, vibrant effect that brightened up my living room.
Step-by-step approach:
-
Gather your paper materials and decide on a color theme.
-
Cut your shapes—don’t worry about perfect edges. Imperfections add character.
-
Arrange the shapes on a sheet of paper or cardboard until you’re happy with the layout.
-
Glue each piece carefully, ensuring edges are flat.
-
Optional: Frame your collage for a finished look.
Pro tip: For small walls, vertical arrangements create the illusion of height. A slim band of collage can make a big impact without dominating the space.
Project 2: Framed Fabric or Scarves
One of my favorite projects was turning scarves into wall art. I had a small patterned scarf I loved but never wore, and stretching it over cardboard gave it a new life.
Step-by-step approach:
-
Cut a piece of cardboard slightly smaller than your frame.
-
Place the fabric over the cardboard, folding the edges neatly at the back.
-
Secure with glue or tape.
-
Hang using clips, string, or place inside a frame.
Pro tip: Mixing patterns, textures, and sizes creates a gallery effect. Lightweight items work best in bedrooms or narrow hallways, keeping the space visually interesting without overcrowding.
Project 3: Washi Tape Wall Art
Washi tape is perfect for beginners. It’s colorful, removable, and won’t damage walls—ideal for small apartments. I first tried this above my desk with a simple triangle pattern using bold colors, and the results were surprisingly lively.
Step-by-step approach:
-
Clean your wall surface to remove dust.
-
Choose a design: geometric shapes, stripes, or a short quote.
-
Apply the tape carefully, pressing firmly to the wall.
-
Peel and reposition if needed—Washi tape allows for experimentation.
Pro tip: Vertical or diagonal patterns elongate walls visually, making small apartments feel bigger.
Project 4: String Art
String art is elegant, adds texture, and works well for small walls. I created a small triangle pattern above my bed using nails and colored strings. It added depth without cluttering the room.
Step-by-step approach:
-
Sketch your design on paper. Start with simple shapes like triangles, squares, or even words.
-
Lightly mark where nails or pins will go on the wall.
-
Place the nails/pins and begin weaving string between them.
-
Adjust tension for clean lines and symmetry.
Pro tip: Don’t feel you need one large design. Two small pieces can be more effective in small spaces, keeping the wall exciting without overwhelming the room.
Project 5: Floating Shelf Art Display
Floating shelves are both functional and decorative. I installed two small shelves above my couch and decorated them with mini plants, small framed art, and decorative objects. The effect was like a three-dimensional art installation.
Step-by-step approach:
-
Assess your wall space and choose low-profile shelves.
-
Install securely using anchors appropriate for your wall type.
-
Arrange decor thoughtfully, focusing on texture and color.
-
Use vertical spacing to add height without cluttering.
Pro tip: Floating shelves are perfect for renters or small apartments—they provide extra storage while showcasing art and decor.
Tips for Beginners
-
Start small: Focus on one wall or corner first instead of attempting a full gallery.
-
Measure carefully: Avoid disproportionate arrangements.
-
Organize materials: Keep supplies in a small basket or box for easy access.
-
Embrace imperfections: Creativity grows with practice. Don’t be discouraged by early mistakes.
Advanced Tips for Small Apartment Walls
Creating a Cohesive Gallery Wall
Gallery walls are the perfect way to showcase multiple DIY projects at once. I arranged small frames, paper collages, and tiny floating shelves above my sofa in a curated gallery style. The wall instantly felt intentional and full of personality.
Tips for beginners:
-
Use a consistent color palette to avoid visual chaos.
-
Mix frame sizes but maintain balance for a harmonious look.
-
Start with a central piece and build outward to achieve symmetry.
Even in small apartments, a well-thought-out gallery wall can make your space feel elegant and purposeful.
Using Mirrors and Reflective Surfaces
Mirrors are especially useful in small apartments—they reflect light and create the illusion of more space. I once used string and washi tape to decorate a small mirror that coordinated with my wall art. It became both decorative and functional.
Step-by-step approach:
-
Choose a small or medium mirror suitable for your wall.
-
Decorate the frame with paint, fabric, or string.
-
Hang the mirror at eye level to reflect light from windows or lamps.
Mirrors make walls appear brighter and larger, while also enhancing your DIY projects.
Seasonal Wall Art Swaps
Changing your wall art seasonally keeps your space fresh and sparks creativity. For example:
-
Winter: Display paper snowflakes in warm-tone frames.
-
Spring: Swap in pastel-colored collages and floral fabric frames.
Tips for easy seasonal updates:
-
Use lightweight, removable adhesives for hassle-free swaps.
-
Store previous art flat or rolled for protection.
-
Mix permanent elements (like shelves) with seasonal decor for versatility.
Seasonal swaps not only refresh your space visually but also keep crafting exciting throughout the year.
Avoiding Common DIY Wall Art Mistakes
Even beginners can prevent frustration by learning from common pitfalls:
-
Less is more: Focus on one wall or single gallery area.
-
Measure your wall and art: Avoid awkward spacing and overcrowding.
-
Choose lightweight materials: Use paper, fabric, and small shelves that won’t overwhelm the wall.
-
Balance textures, heights, and colors: This creates visual harmony.
Over time, practicing patience and planning ensures your projects look polished rather than accidental.
Maintaining your wall art:
-
Dust frames and shelves regularly.
-
Check adhesives or nails for stability.
-
Keep paper or cloth pieces away from direct sunlight to prevent fading.
-
For beginners, washi tape and removable hooks are great—they allow repositioning without wall damage.
With proper care, your DIY wall art can last 3+ years while keeping your apartment vibrant and personal.
Emotional and Practical Benefits of DIY Wall Art
Boosting Creativity and Mindfulness
I often craft in the evenings as a way to slow down and reset. Cutting, arranging, and gluing allows me to live in the moment. The process is meditative, reduces stress, and gives a sense of accomplishment.
Making Your Apartment Feel Like Home
DIY wall art personalizes your apartment. Each handmade frame, colorful collage, or floating shelf arrangement tells a story—about your taste, creativity, and memories. Looking at these pieces makes your space feel truly yours.
There’s nothing quite like the joy of creating something beautiful with your own hands.
In Summary: Transform Your Small Apartment Walls
Your walls don’t have to be empty, dull, or uninspiring. Even small spaces can benefit from simple DIY wall art that adds color, depth, and personality.
Focus on one project at a time, experiment, and gradually build a cohesive display. From paper collages to framed scarves, washi tape designs, string art, or floating shelves, every project teaches patience, creativity, and resourcefulness.
These DIY projects don’t just decorate your apartment—they tell your story, reflect your personality, and make your home feel warm and welcoming.
So gather your supplies, pick a wall, and start creating. Your small apartment walls are waiting to tell your story.
Share:
More Posts
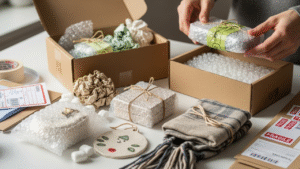
How to package handmade gifts for shipping safely
How to package handmade gifts for shipping safely, Imagine spending hours crafting a delicate handmade gift. You wrap it up, ship it out, and wait
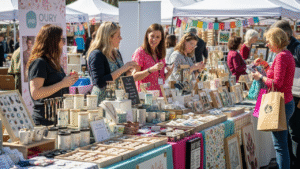
Best Craft Fairs to Sell Handmade Items in the US
Best Craft Fairs to Sell Handmade Items in the US, It would be striking to spend hours making handmade items, only to have no one

SEO Tips for Etsy Listings for Craft Sellers
SEO Tips for Etsy Listings for Craft Sellers, Picture the scene: spending hours creating gorgeous handmade items but not selling ANY on Etsy. Your products
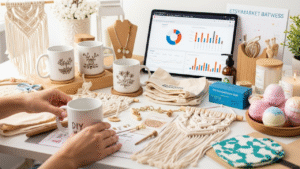
Trending Handmade Products to Sell in 2025
Trending Handmade Products to Sell in 2025, If you spent hours making unique handmade items for sale in 2025, would you struggle to decide which
